
It is important that understand how to maintain the oxygen concentrator unit.
Two simple routine maintenance tasks by the user
1. Cleaning the cabinet air inlet filter
- When the machine is turned off, clean the outside case with a soft wet towel with some detergent. Then wipe it with dry towel, once or twice per month.
- The air intake filter is used to prevent dust, and needs to be cleaned regularly. It is a critical step for ordinary maintenance to clean the filter, at least once a week depending on environmental conditions. This filter may require daily cleaning if the unit operates in a harsh environment.
Operation steps as below:
A. Take off the filter nets at the rear of the cabinet and take out take out the filter (mesh sponge).
B. Rinse the filter (mesh sponge) with clean water. Get rid of the extra water and dry completely.
C. Replace after it’s dry.
D. Use the backup filter while the original filter is being cleaned.
2. Cleaning nasal tube and humidifier bottle
- Clean the cannula every day. First clean it with detergent and then rinse it with cleanwater and air dry completely. Changing a new cannula once a month is recommended.
- The distilled water or cold boiled water in the humidifier should be refreshed every day.
- The humidifier bottle should be cleaned and disinfected twice a week. Clean the humidifier bottle with detergent and then rinse with warm or hot water. Dip it in a household disinfectant for 20-30 minutes, clean it again with warm or hot water, and then air dry. If it’s not in use, please store in a clean bag.
Routine maintenance by the maintenance center
The unit has three filters that require scheduled maintenance and replacement. To ensure that the output of oxygen from the unit is accurate, you must perform an oxygen purity test. An oxygen analyzer is neccessary.
1. Cabinet air inlet filter
The external cabinet air inlet filter is located on the rear of the cabinet and is easily removed by hand.
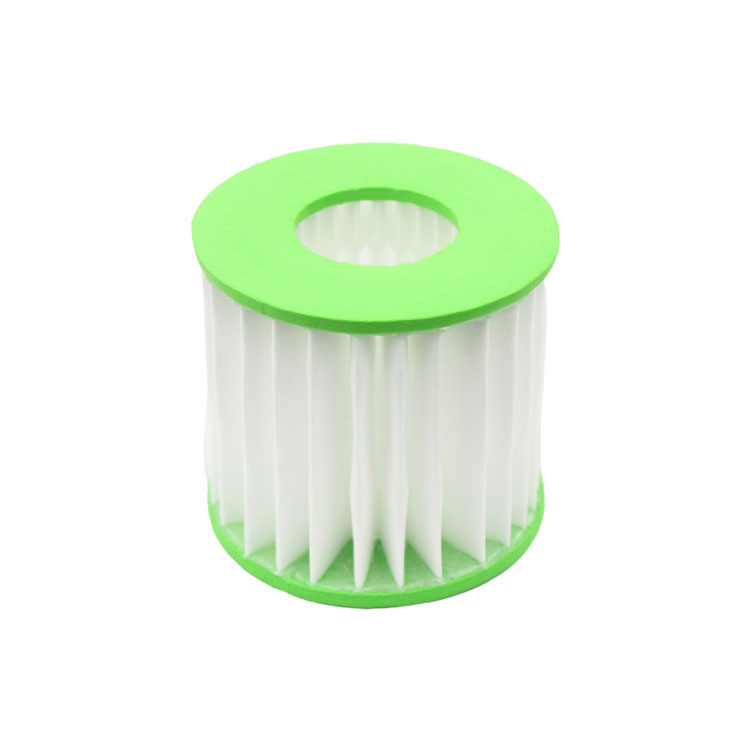
2. Inlet filter replacement
The inlet filter requires changing every 6 months or 4,000 hours of use.
(1) Turn off the power, and unplug the power cord.
(2) Remove the filter access panel to remove and take out the inlet filter.
(3) Replace with a new filter.
(4) Reinstall the access panel.
3. Bacteria filter replacement
The bacteria filter must be replaced after every 5 years or as needed
(1) Turn off the power, and unplug the power cord.
(2) Remove the back cabinet to locate the bacteria filter.
NOTE: Observe the position of the filter before removal.
(3) Separate the silicone tubing from both sides of the filter.
(4) Install the new filter with the inlet side in the same position as before.
(5) Reinstall the cabinet back.
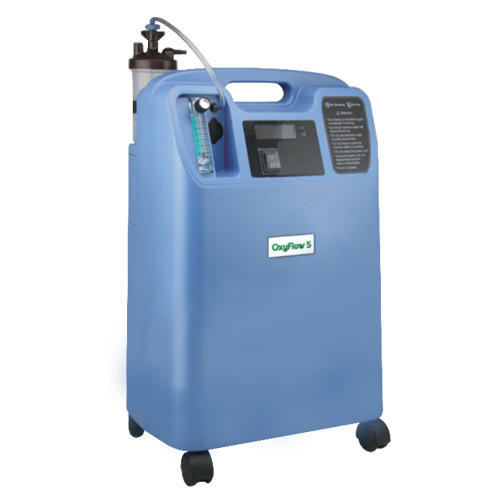
An oxygen concentrator structure

- Oxygen Flow meter
- Serial Port
- Oxygen Outlet
- Knob of the Flow meter
- Humidifier bottle (350 mL)
- Optional function interface
- LCD Display
- Power Indicator
- Alarm Indicator
- Power Switch
- Model Label
- Power Code
- Over-current protector (Repositor)
- Cabinet air intake filters
- Humidifier Band
- Cabinet filter access panel
- Specification Label
- Caster
Maintenance of wearing parts
1. Compressor Replacement
To remove the compressor assembly for replacement, follow the steps listed below:
(1) Turn off the power, and unplug the power cord.
(2) Remove the back cabinet.
(3) Disconnect the connector of the compressor power wires and take out the compressor start capacitor.
(4) Unscrew the clamp which fixed the compressor tube and pneumatic valve, and pull out the tube.
(5) Remove the screw which fixed the compressor springs and the cabinet.
(6) Remove the screw which fix the thermistor wires, and take off the wires.
(7) Pull out the inlet tube. And take out the compressor.
(8) Unscrew the heat exchange, remove the compressor springs, unscrew the R shape clamp of the exchange.
(9) Take away heat exchange and springs.
(10) Snip the capacitor wire.
2. Pneumatic Valve Replacement
The machine uses a pneumatic valve assembly to control the air separation process. The pneumatic valve of the unit requires no scheduled maintenance. Always check if the sieve beds are working after you replace a valve.
To replace the pneumatic valve, perform the following steps:
(1) Turn off the power, and unplug the power cord.
(2) Remove the back cabinet.
(3) Disconnect the pneumatic valve wire connector on the circuit board and lift out valve from the cavity.
(4) Disconnect one side of the tube with sieve bed by pushing the blue washer and pull off the tube, and disconnect the other tube in the same way (Note: You may turn the valve to a proper position to take off the tube).
(5) Unscrew the clamp which fixed the compressor tube and pneumatic valve, and pull out the tube.
(6) Disconnect tube with muffler canister by pushing the blue washer and pull off the tube.
(7) Replace a new valve and perform the valve removal procedure in reverse order to install.
3. Pressure equalizing valve replacement
To remove the pressure equalizing valve assembly for replacement, follow the steps
listed below:
(1) Turn off the power, and unplug the power cord.
(2) Remove the back cabinet.
(3) Push the white washer as the yellow arrows indicate in the Fig, and pull out the tube. And take off the tube at the other side of the equalizing valve in the same way.
(4) Disconnect the wire of the equalizing valve which inserts in the circuit board.
(5) Replace a new equalizing valve and perform the valve removal procedure in reverse order to install.
4. Sieve beds replacement
The sieve beds are the part of the concentrator that removes nitrogen from the air and allows you to get medical grade oxygen. Over time, the sieve beds can become saturated and might require replacement. This will be indicated by an alarm message from the concentrator.
CAUTION: Do not expose molecular sieve (contents of bed) to air for an extended period. Prolonged exposure of molecular sieve to the moisture in room air results in contamination and permanent damage to the sieve material. Keep all openings to the sieve beds sealed during periods of storage.
Sieve Beds Removal
(1) Turn off the power and unplug the power cord.
(2) Remove the back cabinet. Refer to removal method of equalizing valve, pull out the tube from the joint of the sieve bed in the same way.
(3) Pull out the tube which connects with pneumatic valve near the bottom of the sieve bed and take out the sieve beds.
5. Pressure regulating valve replacement
If the flow meter ball fluctuates, or there is low oxygen purity, the pressure regulating valve may need to be checked, adjusted, or replaced. To replace the pressure regulating valve in the unit, take the following steps:
(1) Turn off the power, and unplug the power cord.
(2) Remove the back cabinet.
(3) Pull out the outlet tube, hold the pressure regulating valve tight, and turn anti-clockwise to remove it.
(4) Follow the removal procedure in reverse order to install a new pressure regulating valve.
6. Flow Meter Removal
(1) Turn off the power, and unplug the power cord.
(2) Remove the back cabinet.
(3) Remove the tubes from the flow meter fittings.
(4) Unscrew the flow meter nuts with a wrench.
(5) Remove the flow meter from the cabinet.
To install a new flow meter, follow the flow meter removal procedure in reverse order.
Then perform a leak test on the connections.

